
Part I - Background, Hooks, Rumours and Factions
Part II - Major Places
Part III - Other Places
Part IV - NPCs
Part V - Monsters
Areas Overview
The most interesting places initially for the party with be The Inn of the Welcome Wench and the Moathouse.
The Village of Hommlet — A prosperous crossroads village recovering from the wars against the Temple of Elemental Evil. It is the social centre of the adventure: the characters can find lodging, equipment, information, allies, religious assistance, and enemies hiding in plain sight. The Inn, Church, Grove, Traders, Guard Tower, farms and workshops are all part of this single major location.
The Inn of the Welcome Wench — Important enough to call out separately despite being inside Hommlet. It is the principal meeting place for locals and travelers and effectively serves as the adventurers’ base of operations. Many of the module’s useful, suspicious, and potentially recruitable NPCs can be encountered here.
The Grove — The local centre of the Old Faith and home of the druid Jaroo Ashstaff. It gives the characters access to one of the principal figures investigating whether the old evil is returning.
The Church of St. Cuthbert — The other major religious centre in Hommlet, led by Canon Terjon and Calmert. It represents the newer religious power in the village and another organized opponent of the Temple.
The Guard Tower / Castle — The stronghold of Burne and Rufus. A tower is already occupied by their soldiers while a much larger castle is being constructed nearby. Together they represent the principal military power around Hommlet.
The Ruined Moathouse — The adventure’s principal hostile location, about a league from Hommlet along an overgrown track. Once an outpost of the Temple of Elemental Evil, it now appears abandoned but is occupied by brigands, monsters and other creatures.
The Moathouse Dungeon - Beneath the ruins is a substantial dungeon containing humanoids, undead, guards and ultimately Lareth the Beautiful, who is secretly rebuilding an organized force on behalf of the old evil.
The Inn of the Welcome Wench
The social center of Hommlet and the most likely base for visiting adventurers. Ostler Gundigoot runs a busy, prosperous inn serving locals, merchants, travelers, and adventurers. It is also one of the module’s main information hubs: strangers can meet potential companions, hear gossip, and unknowingly come into contact with agents of the Temple.
FIRST FLOOR
1. COMMON ROOM
Room: Bright, cheerful taproom. Long tables, benches, stools, a fireplace, and the constant traffic of villagers and travelers.
Crowd. Farmers, merchants, laborers, travelers, and adventurers gather here, especially in the evening.
Rumors. The natural place to ask about Hommlet, the surrounding countryside, and recent trouble.
Food & Drink. A substantial menu of meals, beer, ale, mead, wine, and stronger drinks.
NPCs. Many of the module’s transient NPCs can be encountered here.
Opportunity. Characters can find companions, gather information, make contacts—or attract the attention of people watching newcomers.
2. PRIVATE ROOM
Room: Small private dining and meeting room away from the common-room crowd.
Use. Available to guests wanting privacy.
Meetings. A natural location for confidential conversations, negotiations, and private meals.
3. PRIVATE ROOM
Room: Another private chamber for meetings and dining.
Use. Similar to Area 2.
Privacy. Allows groups to conduct business away from the main taproom.
4. BAR
Bar: The working heart of the inn, with drink stores immediately at hand.
Ostler Gundigoot. Usually nearby and well positioned to know what is happening in his establishment.
Drinks. Beer, ale, wine, spirits, and other beverages are stored and served here.
Money. The inn’s daily business means considerable coin passes through this area.
5. KITCHEN
Kitchen: Large fireplace, cooking equipment, work tables, and constant activity.
Staff. Gundigoot’s household and servants prepare meals here.
Supplies. Food and kitchen stores sufficient for a busy inn.
Access. Connected to the working portions of the building and the cellar below.
UPPER FLOOR
The upper story contains guest rooms ranging from simple accommodations to relatively comfortable private chambers.
1. PRIVATE ROOM
Room: Comfortable guest chamber with several beds and normal furnishings.
Lodging. One of the better rooms available to travelers.
Guests. Occupants vary as people pass through Hommlet.
2. PRIVATE SUITE
Suite: More spacious and expensive accommodations.
Furnishings. Better appointed than the ordinary guest rooms.
Guests. Intended for wealthier travelers or those wanting greater privacy.
3-11 PRIVATE ROOMS
Room: Guest chamber containing several beds.
Lodging. Standard private accommodations.
Security. Guests are responsible for their possessions.
12. SERVING WENCHES’ ROOM
Room: Shared quarters for two of the inn’s serving women.
Residents. Two members of the inn staff sleep here.
Furnishings. Simple personal possessions and ordinary bedroom furniture.
13. GUNDIGOOT’S CHILDREN’S ROOM
Room: Bedroom shared by the Gundigoot children.
Residents. The innkeeper’s children.
Character. A domestic detail reinforcing that the Welcome Wench is also the Gundigoot family’s home.
14. GUNDIGOOT’S CHAMBER
Room: Private bedroom of Ostler Gundigoot and his wife.
Residents. Ostler and Goodwife Gundigoot.
Possessions. Personal belongings and the accumulated property of a successful innkeeper.
Security. Important family valuables are kept away from the public portions of the inn.
15. PARLOR
Room: Comfortable private sitting room for the Gundigoot family.
Furnishings. Heavy furniture and household possessions.
Purpose. Private family space rather than guest accommodation.
CELLAR
1. STORAGE AREA
Cellar: Sacks, barrels, boxes, and bulk supplies stacked beneath the inn.
Supplies. Flour, grain, foodstuffs, and other necessities needed to keep the inn operating.
Traffic. Staff regularly move between here and the kitchen.
2. SUMMER KITCHEN
Room: Secondary kitchen used when appropriate.
Purpose. Keeps heat and heavy cooking away from the main living areas during warmer weather.
Equipment. Hearth and ordinary food-preparation equipment.
3. LOCKED STORAGE
Room: Secure storage for valuable provisions.
Contents. Better foodstuffs and other goods worth protecting.
Security. Kept locked against casual theft.
4. LOCKED STORAGE
Room: Secure wine storage.
Wine. Better bottles and reserves kept away from ordinary cellar traffic.
Security. Locked because the contents are valuable.
5. MAIN CELLAR
Cellar: Large storage space dominated by barrels, casks, and the inn’s drink supplies.
Beer & Ale. Much of the inn’s working stock is stored here.
Wine & Spirits. Additional drink stores supplement the common-room bar.
Scale. The quantity of provisions reinforces how busy and prosperous the Welcome Wench is.
6. HUGE CASK
Feature: An enormous cask among the cellar’s drink stores.
Appearance. Looks like another oversized piece of the inn’s brewing and storage equipment.
Secret. More significant than it initially appears; careful investigation reveals something unusual about it.
7. ASHPIT
Area: Ash and waste from the inn’s fireplaces and cooking fires.
Purpose. Mundane disposal area serving the kitchens and hearths.
Search. Not somewhere ordinary guests have much reason to investigate.
8. DISUSED SECRET ROOM
Room: Concealed chamber associated with the cellar.
Hidden. Not part of the inn’s normal public or working space.
Contents. Old equipment and items remain from earlier use.
Discovery. Rewards characters who investigate the cellar rather than treating the inn merely as a menu and a place to sleep.
The Church of St. Cuthbert
MAIN FLOOR
1. HALL
Hall: Bright, cheerful entrance. Walls decorated with paintings depicting St. Cuthbert.
Doors. Several entrances lead into the church proper and adjoining rooms.
Traffic. The normal entry point for parishioners and visitors.
2. PROCESSIONAL
Passage: Formal approach into the main worship area.
Decor. Religious ornamentation and furnishings.
Purpose. Used for processions and movement into the main church.
3. ALTAR AND SANCTUARY
Sanctuary: The religious heart of the church. An altar stands beneath the symbols and teachings of St. Cuthbert.
Altar. Decorated with religious objects and sacred furnishings.
Message. The church prominently displays St. Cuthbert’s practical teachings.
Security. Valuable religious objects make this one of the more carefully protected areas of the building.
4. STUDY AND AUDIENCE CHAMBER
Room: Office and meeting chamber used by the clergy to receive visitors and conduct church business.
Audience. Visitors seeking substantial assistance or consultation may be received here.
Business. Donations, church affairs, and religious matters are discussed here.
Clergy. Calmert or Terjon may meet adventurers depending on the importance of their business.
5. VESTRY
Room: Clerical preparation and storage room adjoining the sanctuary.
Contents. Vestments and other materials used during services.
Purpose. Working area for the church’s priests.
LOWER FLOOR
6. CHURCH KITCHEN
Kitchen: Large working kitchen serving the clergy and church household.
Supplies. Food, cooking equipment, and ordinary household stores.
Activity. Used regularly rather than abandoned or ceremonial.
7. MEDITATION ROOM
Room: Quiet chamber set aside for prayer and contemplation.
Atmosphere. Sparse, peaceful, and deliberately secluded.
Use. Clergy and worshippers may withdraw here for private devotion.
8. EXERCISE ROOM
Room: A place for physical training.
Training. Used regularly for exercise.
Character. A very Cuthbertine detail: the clergy aren’t presented merely as contemplative priests.
9. SACRED TROPHIES GALLERY
Gallery: Displays religious relics and trophies connected with the church and its history.
Displays. Sacred objects and commemorative items.
Value. Some objects are materially valuable as well as religiously significant.
Security. Theft here would bring the full attention of the church.
10. CELL
Room: Small, plain sleeping chamber.
Furnishings. Bed and a few simple personal possessions.
Occupant. Used as clerical quarters.
UPPER FLOOR
11. CHURCH LIBRARY
Library: Religious books, records, and reference works.
Books. Theology, church writings, and other scholarly material.
Research. Potential source of information for characters investigating religious or supernatural matters.
Value. The collection itself represents considerable wealth and knowledge.
12. UPPER HALL
Hall: Landing and passage connecting the private rooms upstairs.
Access. Leads to the clergy’s quarters.
Privacy. Visitors aren’t normally wandering through here without permission.
13. ASSISTANT CLERIC’S CHAMBERS
Room: Private quarters for Calmert.
Calmert. Priest of St. Cuthbert and the church’s energetic fundraiser.
Furnishings. Comfortable clerical quarters with personal and religious possessions.
Money. Church donations and funds may pass through his hands, making him unusually concerned with contributions.
14. CHIEF PRIEST’S CHAMBER
Room: Private quarters of Canon Terjon.
Terjon. Senior priest of St. Cuthbert in Hommlet; experienced and considerably more formidable than Calmert.
Possessions. Personal equipment, religious items, and valuables appropriate to a successful adventuring cleric.
Security. Important possessions are protected rather than casually left available.
15. BALCONY
Balcony: Upper gallery overlooking the church below.
View. Provides a clear view into the main worship area.
Access. Connected to the private upper floor.
The Guard Tower / Castle
The Guard Tower is the fortified home of Burne and Rufus, two experienced adventurers overseeing the construction of a new castle beside Hommlet. Unlike the Moathouse, this is not really an adventure dungeon: most keyed areas establish the strength, resources, personalities, and defenses of two powerful potential allies.
1. MAIN HALL
Hall: Entry level of the tower. Guarded, military, and well maintained.
Guards. A guard is always on duty here.
Defense. The tower’s doors, shutters, arrow slits, and construction make it a serious fortification.
Residents. Men-at-arms occupy and defend the tower under Rufus and Burne.
2. LOWER LEVEL
Level: Functional lower portion of the tower, occupied by guards and supporting the garrison above.
Guards. Armed men are quartered throughout the tower.
Equipment. Weapons and military supplies are readily available.
Response. Trouble inside the tower quickly brings armed assistance.
3. DUNGEON / CELLAR
Cellar: Horses are sometimes stabled here. Stored provisions and supplies support the tower’s inhabitants.
Supplies. Food and other stores sufficient for the garrison.
Animals. Space can be used for horses.
Purpose. Primarily practical rather than a prison or monster-filled “dungeon.”
4. HALL AND ANDRÉ’S ROOM
Room: Living quarters associated with the tower’s household.
André. One of the people attached to Burne and Rufus’s household.
Furnishings. Comfortable but practical; this is an occupied residence, not an abandoned stronghold.
5. RUFUS’ CHAMBER
Room: Private quarters of Rufus, the warrior half of the partnership.
Rufus. Experienced fighter and military leader.
Room. Furnished with the possessions and equipment of a successful adventurer.
Treasure. Personal wealth and valuables are kept here.
Security. Rufus is no careless novice; his valuables are protected accordingly.
6. BURNE’S CHAMBER
Room: Private quarters and working space of Burne, the magic-user.
Burne. Powerful magic-user and one of the most influential people in Hommlet.
Magic. Books, magical equipment, and the possessions expected of an experienced wizard.
Treasure. Considerable personal wealth.
Defense. Burne has taken magical precautions against thieves and intruders.
Clue. His resources make clear that Burne and Rufus are adventurers of a completely different order from beginning PCs.
7. HALL
Hall: Upper circulation area leading toward the tower’s defenses.
Access. Connects the private portions of the tower with the parapet above.
Defense. Anyone reaching this point during an attack is entering increasingly defensible ground.
8. MERCENARY CAPTAIN’S ROOM
Room: Quarters of the officer commanding the tower’s mercenary soldiers.
Captain. Veteran fighter responsible for the garrison.
Equipment. Arms, armor, and military possessions.
Role. Provides professional leadership if the tower is attacked.
9. MERCENARY LIEUTENANT’S ROOM
Room: Quarters of the captain’s second-in-command.
Lieutenant. Experienced fighter and officer.
Equipment. Personal weapons, armor, and possessions.
Response. Helps organize the men-at-arms during trouble.
10. TOP LEVEL OF TURRET
Turret: Upper defensive position with weapon racks and fighting space.
Weapons. Polearms and other weapons are stored ready for use.
Purpose. Defenders can rapidly arm themselves during an attack.
11. TURRET ROOF
Roof: Highest fighting position on the tower.
Weapons. Heavy spears are available for defenders.
View. Excellent observation over the surrounding countryside.
Defense. A strong final position if the lower tower is assaulted.
PARAPET
Battlements: The tower’s exterior fighting platform, protected by crenellations and firing positions.
Defense. Provides excellent cover for missile troops.
Access. Reached from the upper portions of the tower.
Purpose. Makes even a relatively small garrison formidable against attackers.
THE MEN-AT-ARMS
The tower contains a substantial body of mercenary troops, individually detailed in the original module by armor, shield, armor class, missile weapon, melee weapon, and hit points.
Leadership. Rufus, a mercenary captain, and a lieutenant provide the military command.
Troops. A mixture of armor and weapons rather than identical soldiers.
Readiness. The garrison is equipped and organized to defend the tower.
Character. Some are neutral, some chaotic neutral, but Burne and Rufus will not tolerate genuinely evil men in their service.
THE NEW CASTLE
Construction: A much larger fortress is being built immediately beside the existing tower.
Purpose. Burne and Rufus intend this to become their permanent stronghold.
Workers. The project employs many laborers, explaining some of Hommlet’s recent growth.
Politics. The construction demonstrates that Burne and Rufus aren’t merely adventurers staying in Hommlet—they are becoming established regional powers.
Status. The castle is still under construction and isn’t presented as another keyed adventure site.
The Ruined Moathouse
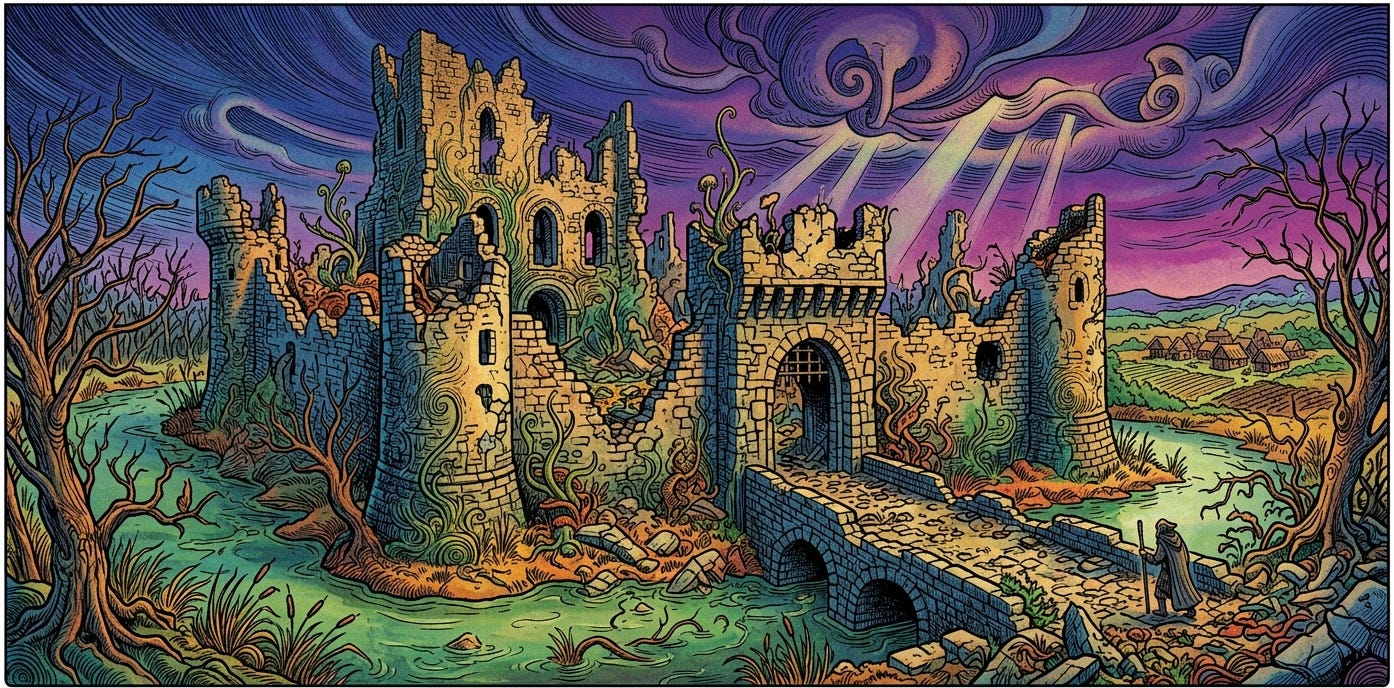
The ruined upper works of the Moathouse are surrounded by marsh and approached across a decaying drawbridge. The place looks abandoned, but brigands and dangerous creatures have made homes among the wreckage.
The important contrast with the dungeon below is that the Ruined Moathouse initially feels like an abandoned place reclaimed by nature and opportunists: frogs, spiders, rats, bats, a snake, a tick, a lizard, and brigands. Finding the stairs down changes the character of the adventure—the dungeon contains increasingly deliberate defenses and organized forces.
1. GIANT FROGS
Marsh: Reeds, stagnant water, mud. Movement in the vegetation near the approach.
Giant Frogs. Six.
Ambush. Attack creatures approaching through their hunting ground.
Terrain. Marshy ground and water make the encounter more dangerous than the frogs alone suggest.
2. ROTTING DRAWBRIDGE
Bridge: Ancient timbers cross the moat to the ruined gatehouse. Obviously decayed, but still apparently passable.
Danger. The bridge is structurally unsound.
Crossing. Weight and movement can cause sections to give way.
Moat. Falling from the bridge puts characters into the foul water below.
3. BROKEN GATES
Entrance: Ruined gates stand open beneath the remains of the gatehouse.
Tracks. Evidence of recent traffic contradicts the appearance of complete abandonment.
Clue. Someone—or something—is regularly using the ruins.
4. COLLAPSED TOWER
Tower: Rubble, broken masonry, and the remains of an old defensive tower.
Huge Spider. One, concealed among the ruins.
Ambush. Waits motionless until prey comes within striking distance.
Terrain. Rubble and confined spaces make spotting and fighting the spider difficult.
5. LITTERED STEPS
Steps: Rubble and debris cover the approach into the surviving portions of the Moathouse.
Signs. Tracks and disturbed debris show that the ruins are inhabited.
Noise. Careless movement over loose stone can announce the party’s arrival.
6. GREAT HALL
Hall: The largest surviving chamber. Once impressive, now wrecked and filled with ruined furniture and debris.
Creatures. Rats and other vermin move through the rubbish.
Search. The debris conceals remnants of the Moathouse’s former occupants.
Atmosphere. The destruction here makes clear how thoroughly the outpost was sacked.
7. BLACK CHAMBER
Room: Soot-darkened, filthy chamber occupied by armed men using the ruins as a hideout.
Brigands. Eight, plus their leader.
Tactics. Organized and wary. They fight together and react to signs of intrusion elsewhere in the ruins.
Treasure. The brigands have accumulated loot from their activities.
Clue. These aren’t isolated monsters—the Moathouse is being used by organized human enemies.
8. STAIRWAY UP
Stairs: Damaged stone stairs climb into the ruined upper structure.
Condition. Broken and partially obstructed.
Danger. Loose masonry and unstable footing make movement difficult.
9. LITTERED ROOM
Room: Broken furniture, rubbish, and remnants of the Moathouse’s former occupation.
Search. Most of the contents are worthless.
Signs. Recent disturbance shows creatures have passed through.
10. EMPTY BEDCHAMBER
Room: Ruined sleeping chamber. Broken furnishings and the remains of old bedding.
Empty. No permanent inhabitants.
Search. Little of obvious value remains.
11. SALON
Room: Once a comfortable chamber, now abandoned and decaying. The ceiling and rafters are alive with movement.
Bats. Scores roost overhead.
Disturbance. Loud noise or intrusion sends them swarming through the room.
Chaos. The bats aren’t a serious combat threat, but can obscure vision, cause confusion, and interfere with light.
12. GIANT SNAKE
Room: Debris and darkness provide excellent concealment for a large predator.
Giant Snake. One.
Ambush. Remains hidden until prey approaches closely.
Tactics. Strikes suddenly from concealment.
13. STOREROOM
Room: Old storage chamber filled with rotting containers, rubbish, and accumulated debris.
Giant Rats. Thirteen.
Behavior. Nest among the refuse and attack intruders.
Danger. Their numbers allow them to overwhelm isolated characters.
Exit. Stairs here descend to the Moathouse Dungeon.
14. EMPTY TROPHY ROOM
Room: Remnants of what was once a display or trophy chamber.
Empty. Its valuables were stripped away long ago.
Details. Surviving fittings hint at the Moathouse’s former wealth and importance.
15. EMPTY ROOM
Room: Bare, damaged chamber with little remaining furniture.
Empty. No current inhabitants.
Search. Nothing immediately valuable or threatening.
16. DESERTED KITCHEN
Kitchen: Broken tables, ruined cooking equipment, old hearths, and decades of grime.
Giant Tick. One, concealed among the debris.
Ambush. Attaches itself to an unwary victim.
Clue. Another example of the wildlife that has colonized the abandoned portions of the ruins.
17. PARTIALLY COLLAPSED CHAMBER
Room: Rubble fills much of the chamber. Broken stone creates numerous cracks and hiding places.
Giant Lizard. One.
Ambush. Concealed among the rubble until prey approaches.
Terrain. Collapsed masonry restricts movement and gives the creature excellent cover.
The Moathouse Dungeon
1. GREEN SLIME
Stairs: Damp stone descending from the Moathouse above. Ceiling: Green slime clings overhead.
Green Slime. Two patches drop on creatures passing beneath them.
Danger. Easily mistaken for ordinary damp growth until it falls.
2. ARMORY
Room: Old armory, dusty and disused. Weapon racks and military debris remain.
Equipment. Assorted old arms and armor remain, mostly mundane.
Clue. The room suggests the Moathouse was once a properly equipped military outpost.
3. WEAPON STORE
Room: More stored weapons and equipment, remnants of the Moathouse’s former garrison.
Weapons. Various usable weapons remain among the neglected stores.
Search. Careful examination turns up equipment of greater value than the room initially suggests.
4. CELL CORRIDOR
Corridor: A row of old prison cells. Rot, stale air, and the smell of death.
Zombies. Twelve lurk in the cells.
Behavior. Initially confined and easily overlooked. They attack when characters expose themselves or open the cells.
Tactics. Their numbers are the danger; the narrow corridor can quickly become clogged.
5. TORTURE CHAMBER
Room: Ancient instruments of torture, chains, restraints, and the remains of the Moathouse’s former prisoners.
Atmosphere. Particularly grim evidence of what occurred here when the Temple controlled the place.
Search. The old equipment and remains reward careful examination.
6. LITTERED STOREROOM
Room: Broken junk, discarded equipment, rubbish, and old supplies.
Search. Mostly worthless debris, but the clutter conceals useful material.
Noise. Searching thoroughly is slow and noisy.
7. OGRE CHAMBER
Creature: A large, filthy chamber occupied by Lubash, an ogre serving the new masters of the Moathouse.
Lubash. Ogre. Brutal, dangerous, and part of the organized force below the ruins.
Tactics. Attacks intruders who cannot demonstrate that they belong here.
Clue. His presence is one of the clearest early indications that this is more than a monster-infested ruin.
8. OGRE’S PANTRY
Room: Prisoners are being kept here as future meals.
Prisoners. Two humans and a badly beaten gnome.
Information. Rescued prisoners can provide information about the inhabitants and activity in the dungeon.
Connection. Lubash (Area 7) intends to eat them.
Note to self - here’s a good place that could be used to expand future play.
9. TRAP
Passage: An apparently ordinary section of dungeon passage conceals a dangerous mechanism.
Trap. Triggered by creatures moving through the area.
Release. A separate mechanism can disable or release it.
Clue. Careful examination can reveal that the passage has been deliberately prepared.
10. BUGBEAR CHAMBER
Creatures: Six bugbears quartered here as part of the Moathouse force.
Bugbears. Six.
Tactics. Organized defenders rather than wandering monsters. They react to alarms and activity elsewhere in the dungeon.
Clue. Their presence reinforces that someone is assembling humanoid troops here.
11. FALSE DOOR
Feature: A convincing-looking door that doesn’t lead anywhere useful.
Purpose. Misdirection and delay.
Danger. Characters spending time investigating it risk attracting attention from nearby inhabitants.
12. GNOLL CHAMBER
Creatures: Nine gnolls occupying a foul, crowded chamber.
Gnolls. Nine.
Tactics. Part of the organized force being gathered at the Moathouse.
Noise. Fighting here can alert nearby areas.
13. GIANT CRAYFISH POOL
Pool: Dark water fills much of the chamber. Something large moves beneath the surface.
Giant Crayfish. One.
Ambush. Remains concealed underwater until prey comes within reach.
Danger. Its claws can seize characters and make fighting near the water hazardous.
14. BURIAL CRYPTS
Crypts: Old burial chambers containing coffins and the dead.
Ghouls. Four.
Behavior. Hide among the crypts and attack living intruders.
Danger. Paralysis makes even a small number of ghouls extremely dangerous to an inexperienced party.
15. ESCAPE PASSAGE
Passage: A concealed route leading away from the main dungeon.
Purpose. Provides the dungeon’s occupants with an emergency escape.
Clue. Its existence shows that the current inhabitants have prepared for attack rather than merely squatting in the ruins.
16. GUARD POST
Guards: Armed men stationed here protect the approach to the dungeon’s inner area.
Men-at-Arms. Six guards and a sergeant.
Tactics. Organized, disciplined, and able to raise an alarm.
Clue. From here onward the dungeon feels increasingly like a functioning headquarters.
17. GUARDS’ BARRACKS
Room: Living quarters for Lareth’s human troops. Weapons, equipment, bunks, and personal possessions.
Guards. Twelve men-at-arms, two sergeants, and a lieutenant.
Tactics. Reinforce nearby guards if alerted. Their numbers make a direct assault dangerous.
Organization. These are paid/recruited troops under a chain of command, not bandits who happen to be living underground.
18. CHAMBER OF THE NEW MASTER
Chamber: The headquarters of Lareth the Beautiful, the “New Master” of the Moathouse.
Lareth. Cleric, charismatic leader, and principal antagonist of the adventure.
Purpose. Recruiting and organizing humans and humanoids into a new force associated with the Temple of Elemental Evil.
Reaction. Intelligent rather than suicidal. He may talk, deceive, recruit, bargain, or fight depending on circumstances.
Treasure. Considerable wealth, equipment, and magical resources accumulated to finance his operation.
Revelation. Lareth confirms the central mystery of the adventure: the evil associated with the Temple is organizing again.